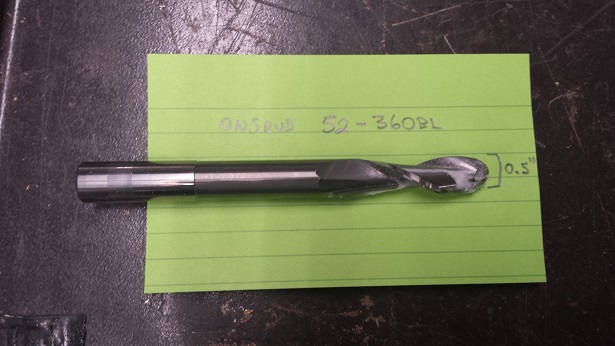
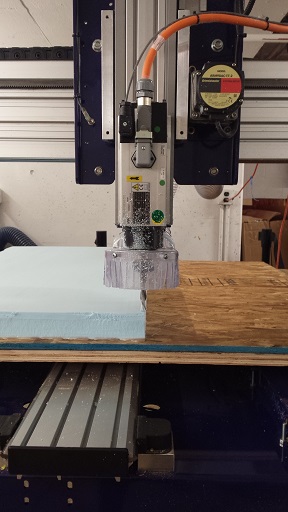
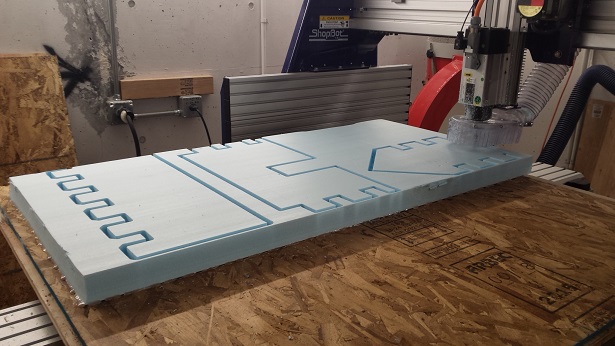
This week we were supposed to make something big using Computer Numerical Control (CNC) machining. We learned how to operate the ShopBot and had the option of using the OCB (oriented strand board) or foam (thickess: 2.05 inch). I worked with Albert and we both used the foam. Here are pictures of the machine and the 0.5-inch bit/endmill that we used:

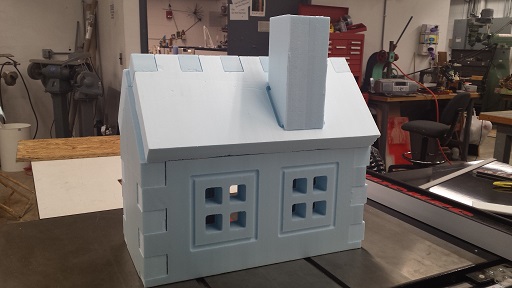
I have very limited drawing skills and this is roughly the picture of a house that I have been able to draw since I was young. So I decided to create that for this week's assignment. I tried to do some math to come up with the numbers:

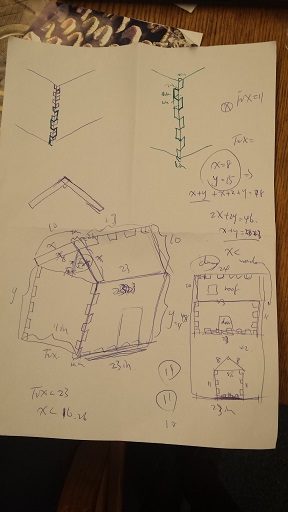
I used Inkscape again for the 2D design. The size of the foam is 2 feet by 4 feet, and the length of my house (the longest horizontal line) is 23 inches. The little squares for press-fit are 2.05 in by 2.05 in.
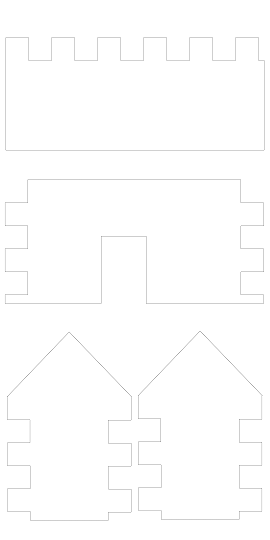

Here are the .svg files and the PDF pages of my design.
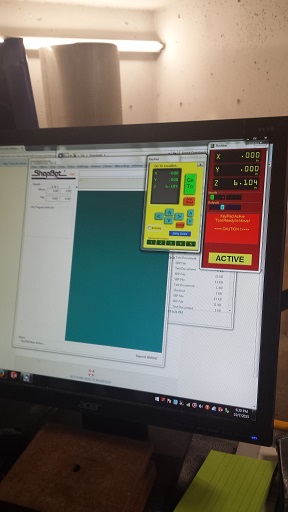
After changing the bit, we had to zero the machine. On the ShopBot software, we clicked on the yellow button to bring up the control pad. We used the arrows to adjust the position of the bed, and then clicked on "zero axes" to zero the x and y axes. For the z axis, we could either use the arrows to adjust the height of the bit and then zero the z axis, or use "Cut(s)...C2 Zero Axis with Zero Plate". If using the latter, we would need to use the zero plate and the alligator clip, and carefully read the instructions on the dialog boxes before clicking "ok".
In Inkscape, I saved the files as PDF and imported them into VCarve Pro. A newer version of the software takes the .svg format as well. In VCarve Pro we can select each of the toolpaths and change the settings. Here is the setting for the 0.5" bit:
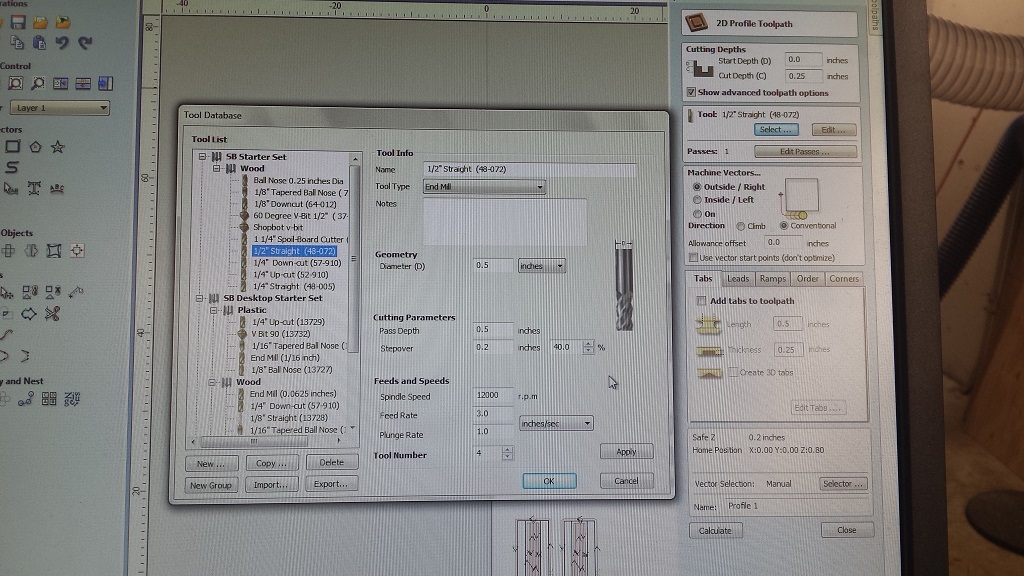
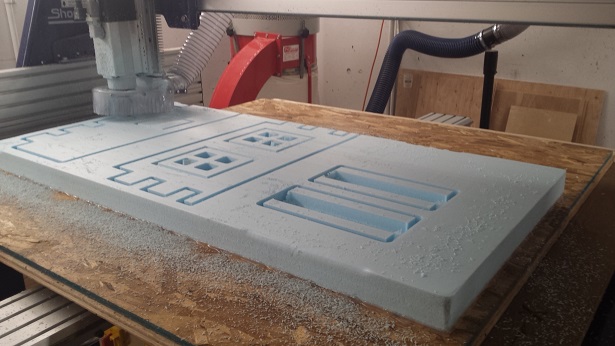
"2D Profile Toolpaths" are good for cutting out shapes while "Pocket Toolpaths" are good for rastering on the surface. Once the toolpath settings are created, we can save toolpaths as .sbp file and then load it into the ShopBot software when the machine is zeroed and ready to cut. To load a file into ShopBot, we need to close the yellow control pad and click on the "Cut Part" button. We will have to turn on the machine using its key at that moment. I've used different settings for different effects; here are some of the details:
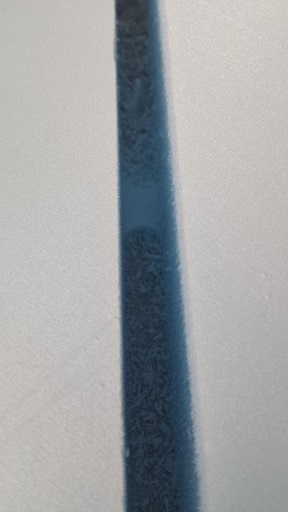
For the frames of the window and the chimney, I wanted to draw a shallow outline on the surface of the roof and the wall, so I used the following settings:

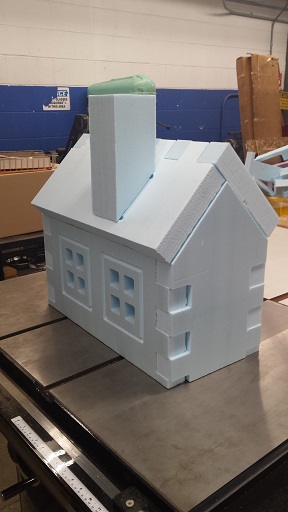
I wanted the chimney to be 4 x 4 x 10 inches, so I did a pocket toolpath to make a 1-inch indent in each half of the two chimney pieces, so that when the two pieces were closed together there would be a 2 x 2 x 10 hollow space inside:
For the hollow windows I used the following settings:
For all the pieces that constitute the wall and the roof of the house I used the following settings to cut out their shapes:
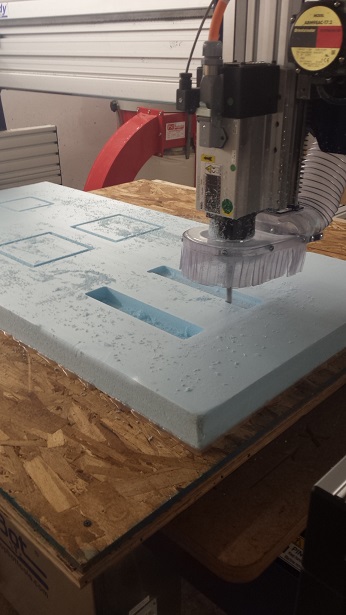
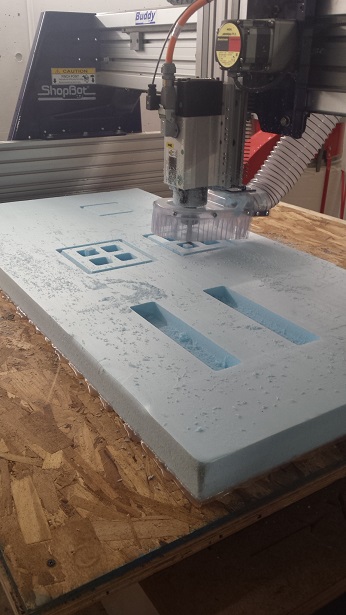
Since my design was 23 inches wide, the board was 24 inches and the bit was 0.5 inch, the shapes could barely fit on the first sheet and the second sheet was missing half-an-inch worth of material on the right-hand-side. I could have rotated those two pieces by 90 degrees and re-run the job, so that I wouldn't have to worry about borders going beyond the size of the foam. But the missing part wasn't too significant and obvious; so I decided not to redo it.
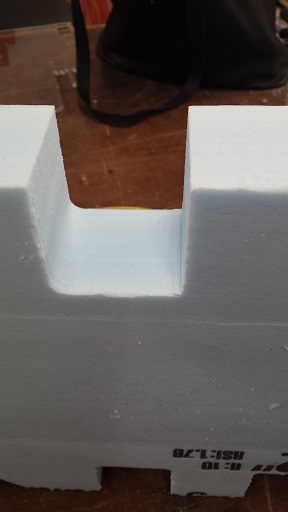
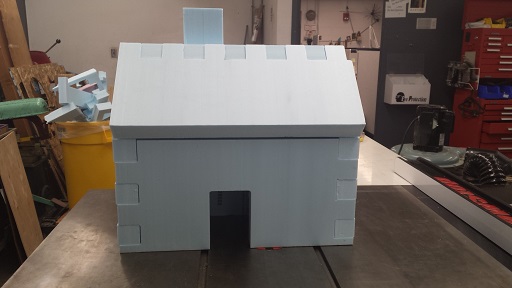
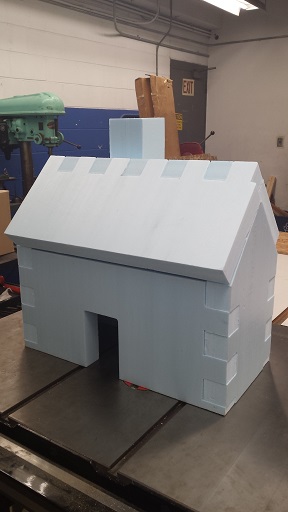
Here is a picture of the tab. Since the bit was round and created a round corner inside the press-fit joints, I also had to do some sharpening on the edges to make the pieces fit together better. I did not use a T-bone structure in my design because I did not want to have small holes in the walls.
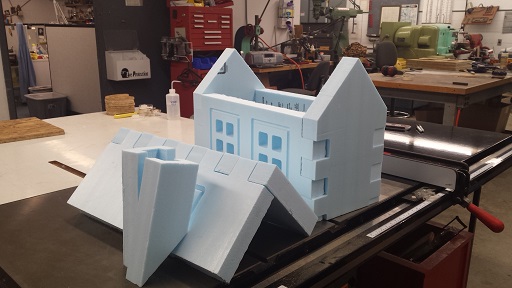
I traced out a 4 x 4 square on top of the roof and wanted to use that as the space to hold the chimney, but then I realized that it should have been a rectangle of 4 x (4√2). So my chimney hole is a bit smaller than it should have been. Also, I could not use the Shopbot to create a hole that is slanted at 45o in the roof piece. So I removed a right-angle triangle from the chimney pieces and sticked the chimney onto the roof using double-sided tape. Here are some of the pictures of the house:
As I was doing the test cut with Albert I had an idea of designing a maze and using the foam to make it. I could use the pocket toolpath again to raster the channels inside the maze. Rob gave me an idea that I could design a robot to run around the maze and that could be my final project. I'll try my best to come up with a robot! :D